Designing a stitch pattern is the 'surface learning', ie 'which stitch should be what colour in order to convey my desired colour pattern', its the texture, formed by stitch structures that add the complexity, let alone knowing how the machine performs the knitting functions and translating the stitch pattern into 'knit speak'.
The Knitting Book
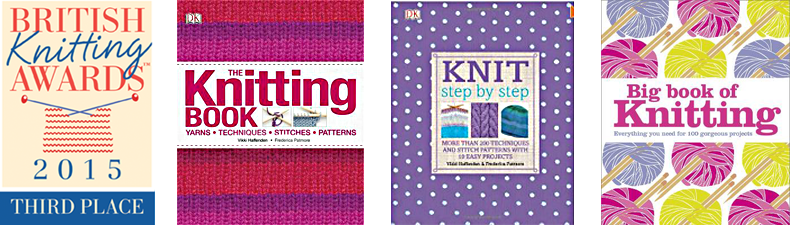
Author and consultant of these titles. Reviews: "When I saw The Knitting Book... I knew I had found the book I needed." "The Knitting Book” is one of those reference books you get when you’re serious about knitting"
Thursday, 6 February 2014
Digital knit design
Having spent the day teaching digital knit design to students my head is reeling. It makes me realise how complex and multi-layered my knowledge is.
The proof photos of the last items for the latest book are coming back soon. I'm looking forward to seeing them as my own photos, whilst they look good when I take them, never match the great quality of the professionally taken ones.
The illustrations make such a difference to a (and I hate to use this word) 'craft' book. I've worked on quite a few, and had very different experiences.
It is clear to me that the 'author takes photos' option has the following disadvantages:
a) can be challenging and often inappropriate for the author's skillset
b) more often than not, results in poor quality images
But it has the following advantages:
a) author retains control of content
b) cheap for the publisher - whether a commercial publisher or self-publishing
As a further observation, it is crucial for good 'how to' books to have big pictures. In the example I mention above, of using semi-professional photos taken at home, the poor quality of the photos was compounded by the layout design cramming them into small frames at the side of text. At first I thought these should have been cropped so that more detail showed, but realistically the photos were original framed poorly so that they couldn't be cropped without loosing content/context - hence the disadvantages of not using a professional photographer.
Having said all this, I am sure some authors take brilliant images and use them very well in books, these are just my personal experiences and observations. I suppose its a moan to publishers really, if they want a great 'how to' book, they need to invest in good photography and give space in the layout for images to be large enough to warrant their investment.
So my advice to other authors (for want its worth), is to persuade your publisher to shell out for professional photography and illustrations whenever and wherever possible.
The illustrations make such a difference to a (and I hate to use this word) 'craft' book. I've worked on quite a few, and had very different experiences.
- taking my own (difficult setting up space with good lighting, not having professional kit, limited knowledge of photography)
- with a semi-professional at home with minimum studio kit (OK experience - although the dogs were a bit of a bind, but the lighting was not good, and the final photos dull)
- with a professional photographer in a commercial studio (exhausting and exacting expereince, great images; strong, vivid and clear, if a little sterile)
- on location with stylists, models and a professional photographer with all the kit (periods of intense boredom whilst everything is shifted around, lighting sorted etc, freezing cold, lots of lugging equipment about and a challenge keeping knitting neat on location, interesting and well lit photos)
- in a professional photographer's own location-based studio (aesthetically exacting, able to be more flexible, easier to keep knitting looking good, marvellous exciting images).
It is clear to me that the 'author takes photos' option has the following disadvantages:
a) can be challenging and often inappropriate for the author's skillset
b) more often than not, results in poor quality images
But it has the following advantages:
a) author retains control of content
b) cheap for the publisher - whether a commercial publisher or self-publishing
As a further observation, it is crucial for good 'how to' books to have big pictures. In the example I mention above, of using semi-professional photos taken at home, the poor quality of the photos was compounded by the layout design cramming them into small frames at the side of text. At first I thought these should have been cropped so that more detail showed, but realistically the photos were original framed poorly so that they couldn't be cropped without loosing content/context - hence the disadvantages of not using a professional photographer.
Having said all this, I am sure some authors take brilliant images and use them very well in books, these are just my personal experiences and observations. I suppose its a moan to publishers really, if they want a great 'how to' book, they need to invest in good photography and give space in the layout for images to be large enough to warrant their investment.
So my advice to other authors (for want its worth), is to persuade your publisher to shell out for professional photography and illustrations whenever and wherever possible.
Thursday, 2 January 2014
First felted creation!
After a little practise I have so far created this neat little wrist pincushion. It should stop me dropping so many pins in my creative frenzy. The children make a fuss when they tread on them - I just think they should wear slippers!


Wednesday, 1 January 2014
The joy of needle punch felting
I have been lucky enough to be given a needle punch machine for Christmas. I've had a few opportunities to experiment with it, but I can see it will take some time to develop my skills.
Tuesday, 15 October 2013
Working on a couple of new designs
Brushing up on my intarsia skills for one of these. Planning to use Adriafil DK yarn on that one, and Sirdar recycled Aran the other. I really like the handle of the Recycled, and the colours are with a few exceptions very 'useable'. It knits up well, feels rather like a cotton yarn but has more texture.
Monday, 9 September 2013

I made this darkly luscious one with layers of chocolate sponge and vanilla sponge cake, interspersed with chocolate fudge icing and cherry jam - subverting the idea of Black Forest Gateau - but not so sweet.
Making cakes is so rewarding, and although the produc is transitory, the effect goes on.
I suppose its like making anything, you don't get the full effect of the experience until you slap on the last decoration. Meanwhile there is triumph when the cake cooks perfectly (or desperation and a quick revision of your plans when it doesn't), then a moment of calm when the bare, undecorated cakes sit cooling.
Trawling my cake decorating books for icing recipes takes a pleasant ten minutes with a cup to tea. Then I realise I haven't got the correct ingredients debate whether to dash to the shops, or whether more improvisation will make this unnecessary. Cutting into the soft, but slightly resistant sponge to make the layers can be nerve wracking, one is always uneven, and of course I always eat the crumbs as they fall off - (but of course there are no calories in food eaten when standing up). Sorting through my collection of cake plates and stands for the right one for the cake design that is forming in my head is fun, but I am ultimately a sucker for this white glazed cake stand. Its an old M&S one, and I find most cakes look far more glamorous than they are when presented on this.
Spreading the icing in between the layers with a wide palette knife is soothing, but coating the cake in runny ganache is hectic, then there is the delicate manouevre of choosing the right moment to add the decorations - just before the ganache sets so that they stick, but not when its too runny or they slide elegantly down the sides instead of staying put on the top!
Finally I really love piping rosettes/stars (whatever they are called), with the star nozzle and a satifyingly plump, squidgy and sticky bag full of icing. Yes its childish, but they looks so pretty... I'm never sure when enough is enough, so have to discipline myself or the whole cake would be hidden under rosettes and stars. Not forgetting the chocolate buttons which have, as the children got older, replaced the Smarties.
So there you are - a cake fit for a sixteen year old!
Yum.
Saturday, 29 June 2013
Retro at its best.
This charming segment shaped alarm clock caught my attention in a local shop window. The sun was so bright that sadly the photo is not brilliant. The shop was closed, so I plan to go back and buy it if its still there.


Dr Vikki Haffenden
Sent from my iPhone.
Subscribe to:
Posts (Atom)